Sunday, March 12, 2023

Save Your Scraps: How you can use Your Scraps in Cardmaking

 Hi everyone! As I was creating some card fronts, I was shocked by the amount of paper I was wasting. Those little scraps add up and cardstock isn't cheap. Today, I want to show you how you can use your scraps to make a new card! Also, if you haven't checked out my second guest design with Newton's Nook, you can find that here! Lets get started!


The first step in creating this card is making the strips out of your scraps. Mine were "pre-made" from cutting card fronts! The ones I used are a half an inch wide by 11 inches long, but you can use any size you'd like!


Once you have made your strips, then you need to select your ink pads to use. I used my Catherine Pooler ink pads, which are my favorite, in the colors Flirty Fuchsia, Pucker Up, and Glam. Then I used a technique called swinking. This is where you swipe ink pad across paper to color it! I realized after the fact that the colors I chose look like the Cheshire Cat from Alice in Wonderland!


As you can see above, some ink is wasted on your mat. You could spray a little water down and create a mixed media background with the ink! Then, once all of your strips are colored, start glueing them to your card base. You can do them in whatever pattern you like, but I just alternated the colors. 


Then I trimmed off the excess, and added a border with some reflective gold cardstock. I also cut out my "hello" die from Cathy Zielske. Once everything was assembled, I glued it onto my card base which finished the card!


Thanks for reading!

Thank you so much for reading! This is my fourth month of consistently posting on my blog and I keep doing it because I love inspiring others! If you make a card with this technique, I would love to see it! You can find a supply list below and as always, happy crafting!


Supply List (No Links are Affiliate)


Saturday, March 4, 2023

Same Stamp, Two Different Outcomes! A Collab With Michelle Ruelle AKA Stamparuecreations

 Hi everyone! I'm so excited to have my crafting bestie Michelle on my blog with me for this post! We decided to use the same exact flower stamp, but create two totally different cards with it! Hers is a much more classic vibe while mine is a little funky, but both are amazing! I will prefice you that there won't be a supply list this week because so many amazing products were used, but we will mention all the products we use in the directions! Here are her social media link! If you don't follow Michelle already, you should. She does amazing work for senior citizens, donating over 5,000 cards in 2022! Not to mention how amazingly talented she is!

Instagram 

Stamp-A-Rue Creations Website

Facebook


Card 1; A Classic Card by Michelle 


First, Michelle stamped the Meadow Flower stamp from Technique Tuesday (which has been retired due to Technique Tuesday's closing) in black ink from VersaMark. She then colored the flower with the Copic colors Y00, Y04, and Y08. She then colored in the leaves, also with Copic markers, in the colors G21 and G24. After all the coloring was complete, she restamped the stamp with the same ink and applied gold embossing powder. I personally think this was an amazing touch! It makes it look so elegant!


She then started working on that wonderful background! She applied Catherine Pooler ink in the color Bellini through the trellis stencil from Altenew. After that was complete, she sprayed a gold spray to add a mixed media affect to the card! She then stamped the "Hooray" sentiment from the Meadow Flower stamp set and also embossed it in gold embossing powder. 


Once that front panel was complete, she glued down the flower and added a gold border to the panel! She then added some pattern paper from the Pink & Main Dragonfly Dream paper pack to add the finishing touch! She glued everything to her card base to finish off the card. This card came out absolutely beautiful! All of the touches of gold complete the card in my opinion!


Card 2; A Funky Mixed Media Card by Brennan


The first thing I did was put some ink from three different ink pads onto my glass mat and mixed them with a little water. I used two Catherine Pooler ink pads in the colors Garden Party and Cummerbund and an Altenew ink cube in the color raspberry. I then put some of that liquid onto my paint brush and lightly tapped it over the card front to get the splatter effect! 


I then stamped the Meadow Flower stamp onto the card front also in VersaFine ink. It's kinda funny that we both used Catherine Pooler ink pads and the VersaFine ink pad! I then applied clear embossing powder to the flower and melted it with my heat gun. With that being done, the card is almost complete! I added a small black border to the card front and then glued that to my card base!


Thank you for Reading

Thank you all so much for reading! Michelle and I both hope that we inspired you in some way, shape, or form. We wanted to share how you can use the same stamp and create two extremely different cards and I think we accomplished that! Once again, if you haven't followed Michelle yet you really should! Have a nice day and as always, happy crafting! 

Saturday, February 25, 2023

Two Stencil Techniques to Try

 Hello everyone! First off, I would like to thank everyone for all the kind comments I received about my guest design with Newton's Nook. Doing that guest design was a dream come true and I'm so happy that y'all enjoyed my card as much as I enjoyed the experience. If you didn't see my guest design, click here! This week I'll be sharing two techniques with stencils that you need to try! I'll admit, my results weren't the best, but I know better results are possible! Either way, I would still use these for card backgrounds! You'll find a supply list below of all the supplies I used!


(This is the stencil I'll be using!)


1. Distress Oxide Color Pencils


Yes, I know, this looks like a paper crafting massacre took place. However, even though I failed, you don't have too! What I did was applied my Tim Holtz Distress Oxide watercolor pencils through the Cow Dots stencil from Simple Stories. Then I removed the stencil and sprayed water. My problem you may as, not spraying enough water. Too much of the pigment stayed inlace and it was my fault. If you do put enough water and the color properly spreads, I could see a really cool galaxy background! 


2.  Swinking Through a Stencil


This one (in my opinion) came out much better! If you don't know what "swinking" means, don't worry! It is a word coined by the crafting community (I believe Laurel Beard and Ardyth Percy-Robb used it first, but I don't know which invented it) that means to swipe your ink pad directly onto your paper. In this case, I applied two Catherine Pooler ink pads in the colors Garden Party and Cummerbund! 


Thank you for Reading!

Thank you all so much for reading! You guys have no idea how much it means to me to see other people learn from my blog and instagram posts. Once again, I apologize for not having the best results, but I still think these are two great techniques to try, even if I failed. And remember, if you mess up two, don't worry about it! We are all human and all make mistakes, the best thing you can do is learn from them! Once again, thank you so much for reading and as always, happy crafting! If you want to buy any supplies, please go to the links below. None of them are affiliate, however, they are mostly to small/smaller business!


Supply List (None of these links are affiliate links)


Essentials: What I use on every card

- Art Glitter Glue (you may not be able to get this due to temperatures so I also recommend Lawn Fawn's glue)


Supplies Specific to This Post


Friday, February 17, 2023

Newton's Nook Guest Design

 Hello everyone! I am so excited to share that I am a guest designer for Newton's Nook this month! It has been my dream since I started card making to design for a company and it's coming true. I want to say thank you to both Jen and Samantha! They have both helped me so much during this process and have been so kind! Head over to Newton's Nook Designs blog for my full write up! I'll also be back on their blog next month as a guest designer as well! Happy crafting everyone!


Here is the link for the full write up!


Sunday, February 5, 2023

American Crafts Doesn't Want you to Know This

 Hello everyone! As you may know, I got my start on Instagram by posting crafting deals. I want to continue sharing these on my blog, so here's one on cardstock! 


Colorbök is a brand made by American Crafts. While a typical pack of cardstock can run you anywhere from 15-25 dollars, Colorbök is under 6 dollars at Walmart! There is only one con and that there is a slight waxy finish that can prevent ink from sticking, but for 6 dollars (in my opinion) it is still extremely worth it! If you do pick some up, I hope you like it! As always, happy crafting and hope to see you at my next post!

Also here is the link to find all the Colorbök pads at Walmart!


Saturday, January 28, 2023

RUN: Copic Marker Deal at Hobby Lobby

 Hello everyone! In Lieu of a tutorial or review today, I wanted to post an extremely good deal on copic markers. Right now at Hobby Lobby they are on Clearance for 75% off making them only 1.99 each! As you may or may not know, Hobby Lobby is not going to be carrying the Copic brand so this will be your last chance to buy them there at an exceptionally low price! 


 There is one tip I have for you. Call ahead. Some stores could be out of them at this point while others haven't even put them on clearance yet. I hope you have some good luck finding these and as always, happy crafting!

Saturday, January 21, 2023

Marker Storage Review

 Hello everyone! As my Copic marker collection has been slowly growing, I decided to pick up a new way to organize them. I was originally storing them vertically in a old cookie tin, but that was starting to fill up so I knew I needed a new storage unit. Below you will find my review of the one I picked up. Also, a special thank you to my crafty friend Jenee for giving me the majority of my Copics!


This is the organizer I went with! It cost 25.99 at the time of me writing this blog and it came with two of these pencil holders that each have 6 slots. There is a plethora of other sizes and amount of compartments from this company but this is the one I went with! 


I flipped them on their side and stacked them. I have plenty of room for expansion and they are extremely sturdy! Each slot can fit 12 Copic classics or 18 Copic sketch markers. That means both of these organizers can fit 144 Copic classics or 216 Copic sketch!


Pro's

- Extremely sturdy plastic 

- Can store up to 216 copic sketches

- Stackable

- Cheaper than alternatives from Create Room or Spectrum Noir


Con's

- Strong chemical smell when opening the packaging, but this fades after a day or two


Final Verdict 


With prices ever increasing, finding cheaper storage solutions can be a challenge. However, sometimes you find a hidden gem and I believe that this one is! I totally recommend this storage solution for markers and believe it could be a great fit if you need to store any type of marker that is around the same length as Copics! While the chemical smell does leave me with a few questions, it wouldn't stop me from buying another storage unit from this brand.


Thank you for Reading!

Thank you so much for taking the time out of your day to read my blog post! I hope you find it helpful! Here is the link to the storage unit! (This is NOT an affiliate link) Happy crafting everyone!


Saturday, January 14, 2023

Crafting Mishaps: How to Fix a Card When Your Stencil Shifts

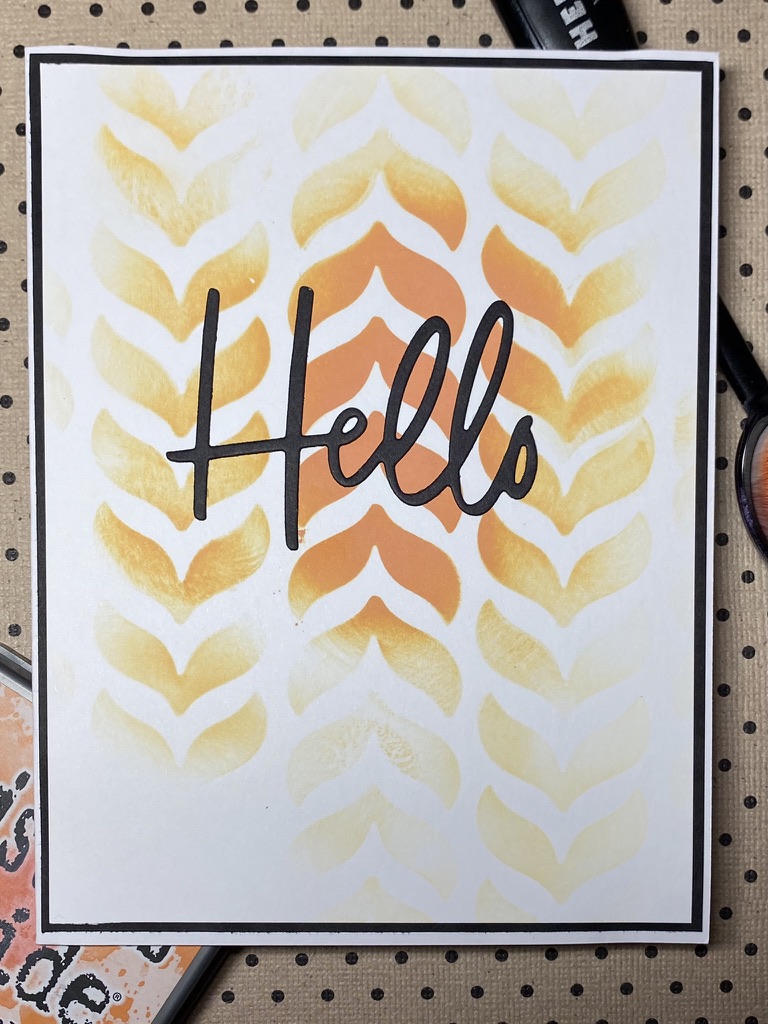
Hi everyone! When making the card for this weeks blog post I had an entirely different idea. However, my stencil shifted and I thought what I could do to save this card. So I changed my plan, grabbed a die cut, and saved the card!


So what I used for the card front was a Tim Holtz distress oxide ink in the color spiced marmalade, Altenew's leaf drop stencil, a Hero Arts blending tool, and some white cardstock. I taped my stencil to my paper with pixie tape, but not enough. My paper shifted and I decided to add a die cut!


I pulled out this hello die cut from pink fresh! This is one of my favorites and I decided to cut it out of some black cardstock. Then just glue it on wherever you like on the card front, I picked the center.


Then all I did to finish the card was add a black border to the card front and glue it to the card base! Then your card is complete!


I really hope that you all enjoyed this tutorial. No more wasting card fronts! Below you'll find a supply list! Happy crafting everyone!


Essentials: What I use on every card

- Art Glitter Glue (you may not be able to get this due to temperatures so I also recommend Lawn Fawn's glue)

-Tim Holtz Distress Ink in Black Soot (Technically didn't use this but it is my favorite ink pad!)


Extras: What I Used Specifically on This Card


Saturday, December 31, 2022

Catherine Pooler Ink Pads: Are They Worth It?

 Hello everyone! I'm back today with a review of the Catherine Pooler ink pads. I recently picked up a few colors and wanted to share my thoughts about them. Hope you all enjoy!


Pro's


- There is a large variety of colors with coordinating groups. This is especially good for layered stamping and ink blending.


- They are extremely juicy so they last for a long time before needing a refill.


- There are re-inkers so you don't have to buy a new ink pad when it becomes dry.


- They work amazing with ink blending.


- The ink stays wet long enough for you to emboss even though it is a dye ink.


Con's

- They stain horribly, especially black. Remember, this doesn't effect how the image comes out, just the appearance of the physical stamp.


-They don't always give the sharpest image. Since they are so juicy the borders of the stamped image aren't always perfect.


- The lids come off very easily.

My Recommendation 

I personally think that these ink pads would be a great addition to your craft room. There is a reason so many crafting youtubers use them and why they're so popular. The con's don't out weigh the pro's for this ink pad. If you've been thinking about getting some dye ink pads, these are the ones I'd get. If you do get them I hope you enjoy them. As always happy crafting. Also happy New Year!

Saturday, December 24, 2022

This Card is Floating out of This World

 Hello everyone! Today I'm back with a tutorial. I will be using almost all Altenew supplies for this technique! I really like how this card came out and I hope you do too! (Blogger is also letting me make the images a bigger size without the quality decreasing!)


First off you want to pick out what you want to use to make float above the card base. I decided to use the Book Engravings set from Altenew. While I am using a stamp set, I think this technique would work amazingly with basic die-cut shapes like circles or scrapbooking ephemera. I would love to see your spin on this tutorial!


I will also be using Tim Holtz's black soot Distress Oxide ink pad and a set of Altenew's blue ink cubes. I'm stamping the layered flower in blue but leaving the leaves back and white. Once you stamp them cut them out!


Once you have everything stamped (or decided on the ephemera you're using) decide the layout that you want. I'm using the card front I will be gluing everything on as a reference to ensure that most pieces fit but you do want some to hang off!


Once you are happy with your layout, pop up each piece with foam. I'm using foam tape from dollar tree but you can use whatever brand makes you happy. You also could just glue the flower and leaves as they are, but I personally like the effect when the height is added.


Once you have made everything "levitate" cut off any pieces that hang off of the card base that is 4 x 5.25 inches. If you want to leave the pieces hanging off on the final card just use a bigger envelope when gifting it so it doesn't get damaged.


All that's left to do is back the card front with a piece of blue cardstock and then glue that onto the card base! I really enjoy how the different blues work together and how everything looks floating above the card! You could also add a sentiment but I didn't want to use one so this card could be used for any occasion!


Thank you all for reading. I hope you guys enjoyed this tutorial and will try it out! You can find the supply list below. I would love to see what you make, and as always, happy crafting!


Supply List (None of these links are affiliate links)


Essentials: What I use on every card

- Art Glitter Glue (you may not be able to get this due to temperatures so I also recommend Lawn Fawn's glue)


Extras: What I Used Specifically on This Card


Saturday, December 17, 2022

Must Get Crafting Items for 2023

Hello everyone, Brennan here! This week I have a list of my favorite crafting items and tools that you must get for 2023. Ok, while you don't need all of them, all of these would be great additions to your craft room!


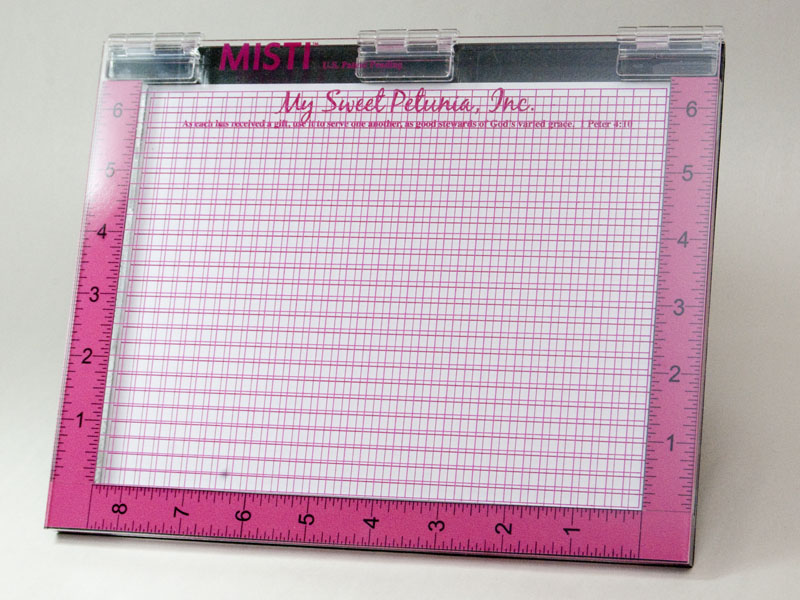
1. A Misti Stamp Positioner Tool


There are only good things to say for the Misti! It is extremely high quality and the magnet is extremely strong so your paper will stay in place. They come in multiple sizes, all the way up to 12x12. I personally use the one with a stamping area of 6.5x8.5 inches!


2. Distress Oxide Ink Pads


Tim Holtz did it again when he released these ink pads. While they have been around for a long time, they have never gone out of style. They are amazing for ink blending and give off a chalky look. They are a hybrid ink which means they have both pigments and dye.


 3.  Any Die-Cuts From Waffle Flower


Waffle Flower Crafts makes amazing die cuts! They are extremely high quality and you get the perfect cut every time! I personally use their nesting die cuts the most, but all of them are great.

Thank you guys for reading this post! I personally use and love all of these items I recommended and if you buy them I hope you do too! You'll find below a list of the products and where to find them


Supply List:


- Distress Oxide

Saturday, December 10, 2022

Two of my Favorite Crafting Storage Ideas

 Hi everyone! This week I thought I would change things up and make a post about storage. As crafters, most of us buy more craft supplies than our room can fit! In this post, I'm going to try to help you solve that problem!


This first craft storage item that I love is a rolling cart. I personally store some pastes, alcohol markers, and stamps! When you're at your desk you can pull it up right next to you. This means you don't even have to get up to grab a different stamp set or some Nuvo paste! My cart also has some extra like a ribbon holder and a peg board. I'll link mine below! A person who does planning could store their stickers or a scrapbooker could store all their ephemera, the possibilities are endless!


I also really like using magnet sheets for die-cut storage. They allow you to use space that typically wouldn't be usable! This is a great option for people who have smaller craft rooms or who have run out of space in general. I use printable magnet sheets, they weren't too expensive and work well! 


I hope that everyone enjoyed this post. While it isn't a tutorial,  I still think it can be extremely helpful! I hope that everyone has a great day! Happy crafting, or should I say happy organizing!
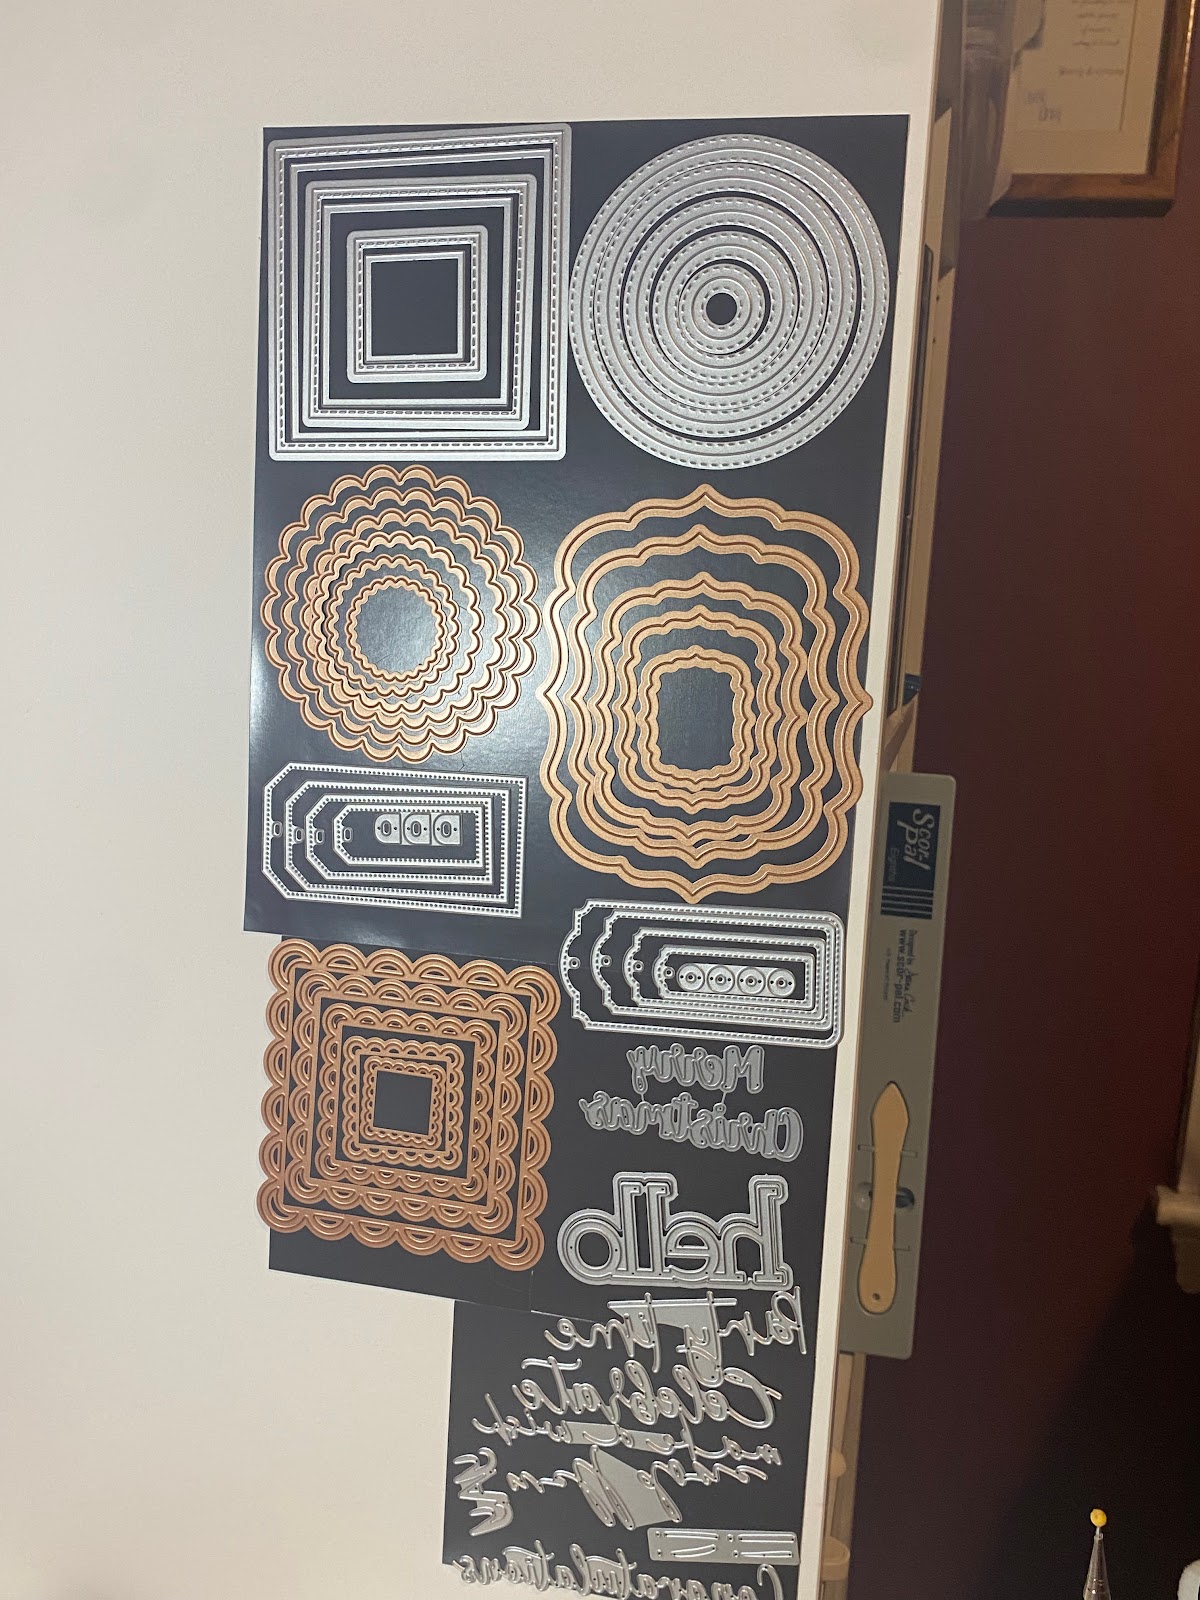


Items in This Post (None of these are affiliates)


Saturday, December 3, 2022

Elevating Cards with Perfect Pearls

 Hello everyone! I'm so happy to be here again today to share another amazing technique. I recently picked up some perfect pearls and I want to show you how you can step your cad up with them. We're also going to use a little ink blending and stamping too!


Ignore my messy mat for starters. But the messier the mat, the more well-loved! First I'm taking a card front (4 x 5 1/4 inches) and adding an inch of tape on each side. This is where we'll be doing the ink blending.


I will be using Tim Holtz's Distress Oxides in the colors Faded Jeans and Uncharted Mariner. As you can see, my ink blending didn't come out the best but that's ok! The perfect pearls will save my ink blending and make the card look even better!


I will be using this fluffy paintbrush and some perfect pearls in the color perfect pearl. Dip the brush into the pearls and apply to the paper liberally. You can blow off any excess, we just want to ensure that the inked portion of the card front is fully covered!


This is something like how yours should look! It looks pearlfect (see what I did there) Next we're going to stamp the flower I'm using on this card! I'm using this lilac from Technique Tuesday, but unfortunately, they have recently decided to close down. I will link another one of my favorite florals below instead of this one. Apologies for that.


I will be using copic markers G07 and V17 for this card. However, I'm not shading so truly any coloring medium would work! Once you color in your flower, die-cut it out. I do have a coordinating die for this flower but fussy cutting would work too!


Then you should glue the flower onto the card front at this point! If you want to, you can add a sentiment too! I will be adding get well soon to my card.


Once you do that, decide if you're going to add a border or not, I went with a black one. All you have to do is glue the card front to the card base and you're done! I hope y'all enjoyed this tutorial! If you want to buy anything I used, almost all the supplies are linked below! I really like how using the perfect pearls came out, it gives the card such a great shine. Happy crafting everyone!


Supply List (None of these links are affiliate links)


Essentials: What I use on every card

- Art Glitter Glue (you may not be able to get this due to temperatures so I also recommend Lawn Fawn's glue)


Extras: What I Used Specifically on This Card

- Coloring medium of your choosing


- Different Lilac Stamp (This one is from Newton's nook and I love it! I've used it in a ton of cards and it has a coordinating die!)


- Tim Holtz's Distress Oxide in Faded Jeans and Uncharted Mariner